

If you have a computer running Windows 10, it’s a good idea for it to have a regular service to ensure that it’s performing at its best. As an IT support professional, I carry out regular maintenance operations on standard computers and the best laptops workstations. I call this type of service a computer health check and tune-up and I’ve broken the operation down into a seven-step process. Let’s look at these seven maintenance steps you can take to ensure you have a healthy Windows computer.
1. Hard Drive Health Check
The first step is to check the health of your computer’s hard drive. If it turns out that your hard drive is nearing the end of its life, then there would be no need to carry out the remaining steps. It would be a much better solution to replace the hard drive and reinstall the operating system and the applications you use. If your hard drive is indeed approaching the end of its life, it’s an ideal opportunity to replace it with a Solid State Drive (SSD) which will result in a significant improvement in the speed of your computer.
The health of a traditional SATA hard drive can be checked by reading its SMART status. This is self-monitoring technology that is built into hard drives and which provides information about the status of the drive and its likelihood of imminent failure. The status can be checked using command prompt but I prefer to use a utility that readily provides more information. There are plenty of options out there but I normally use a tool called CrystalDIskInfo. This utility returns the health status of the drive, together with lots of other information.
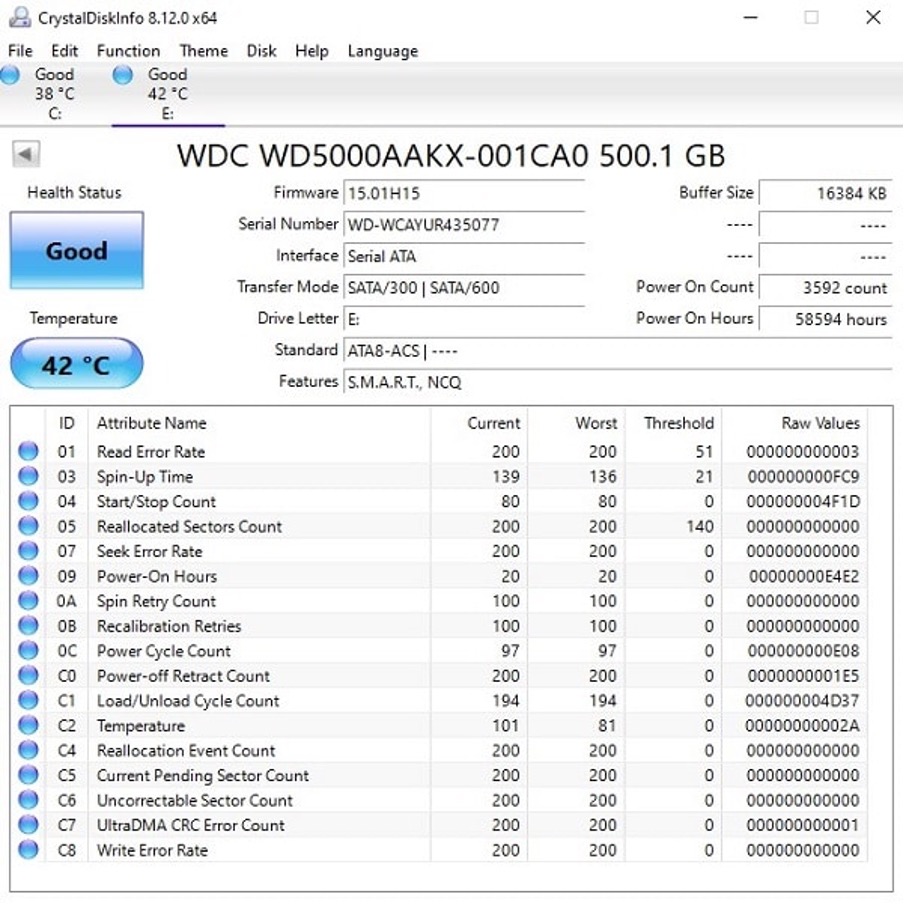
Checking a hard drive’s SMART status is only relevant if it’s a traditional spinning SATA hard drive. This technology doesn’t apply to SSD’s. If your computer already has an SSD, you can skip this step and move on.
2. Hard Disk Clean-up
Once you’ve established that your hard drive is healthy, it’s time to clean it up by removing unnecessary clutter and files which are no longer in use. The easiest way to do this is within File Explorer. Just right-click on your hard drive and select Properties. Then click on Disk Clean-up. After a short time, you will be presented with a window showing files that can be safely deleted without harming your operating system.
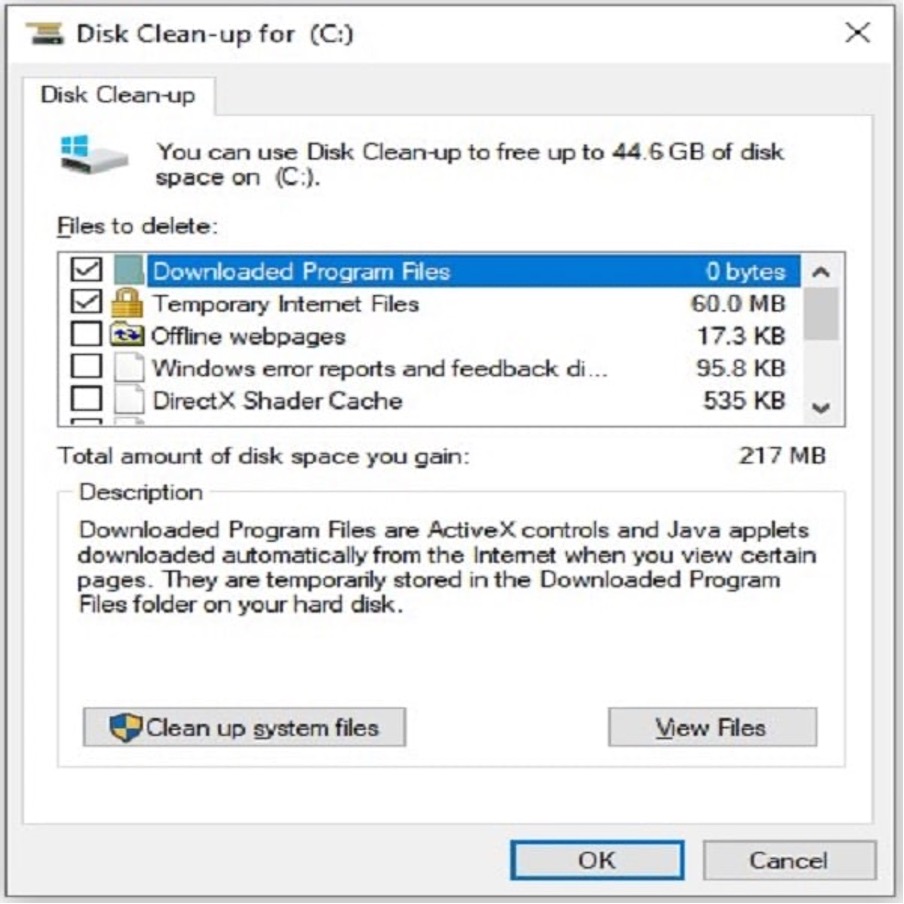
Tick the boxes to select the items you’d like to delete and then click OK. If you want to free up even more space, you can click on the box labeled Clean up system files. After doing so you will be presented with another window in which you can again select items you’d like to delete.
3. Malware & Virus Scan
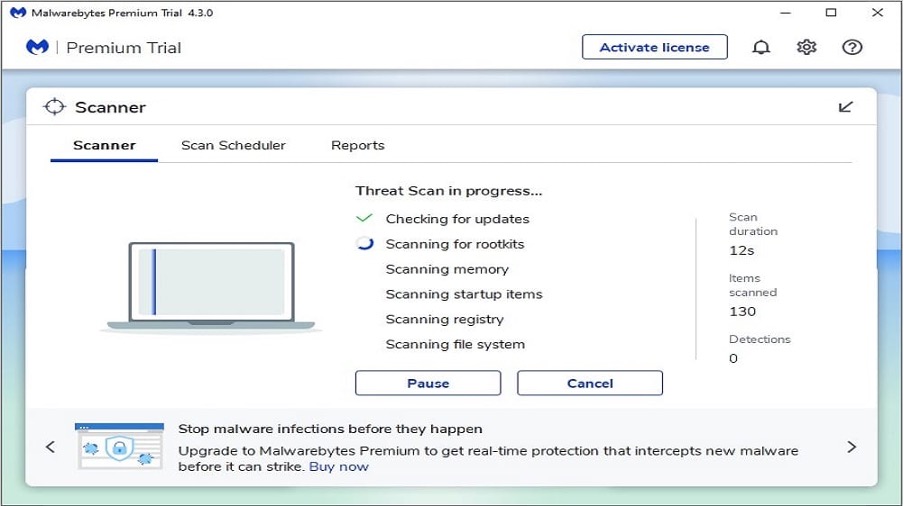
No computer health check is complete without a scan for malware and viruses. You may have antivirus software running on your computer but this doesn’t necessarily mean you’re virus-free. I’ve previously written a comprehensive guide to virus removal but for the purpose of this health check, a single scan with a high-quality malware scanner is all that is required.
For this purpose, there is no better product than Malwarebytes. It’s available on a 7-day free trial and, for the purpose of one-off malware removal, the free trial is adequate. Malwarebytes does an outstanding job and provides a thorough removal of malware and spyware.
When running a scan using Malwarebytes I would recommend enabling the Scan for rootkits option, as well as the option to Use expert system algorithms to identify malicious files. Enabling these options will result in a more comprehensive scan.
4. Uninstall Unnecessary Software
Most computers that have been around for a while will have had a number of applications and software packages installed. You may find that you even have software installed which you don’t recall installing, or which you used for a one-off purpose but then never removed again.
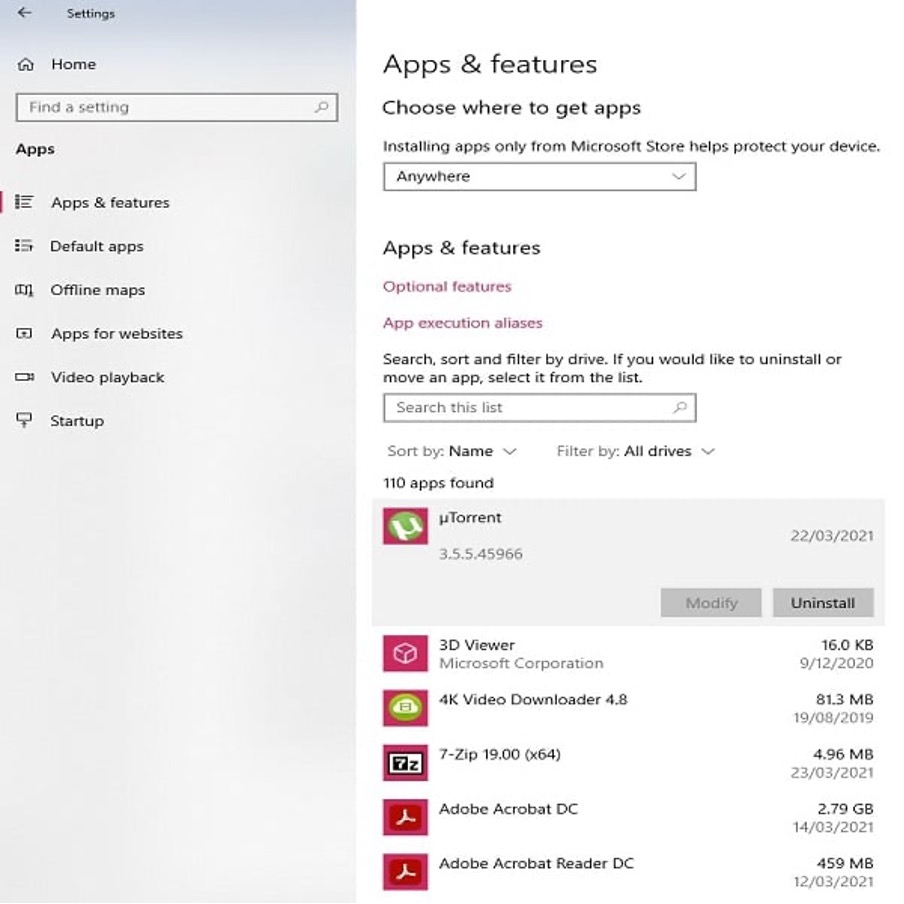
Traditionally you would have opened the Programs and Features pane in Control Panel to view a list of the programs installed on your Windows computer. However, nowadays you may well find that not all your installed applications will actually appear in the list in Control Panel. In particular, apps that were installed from the Microsoft Store will not appear in the list.
In order to see the full list of apps and programs installed on your computer, enter the Windows Settings by pressing the Windows key with I. Then select Apps to see the full list. You can then uninstall any one of these by clicking on it and selecting Uninstall.
Although the Windows uninstaller is the standard method for the removal of installed apps and programs, it tends to leave some files and registry entries on the computer following the uninstall. For this reason, I prefer to use a more comprehensive uninstaller such as Revo Uninstaller. Using a product such as this means that no trace of the installed app or program is left behind the following an uninstallation.
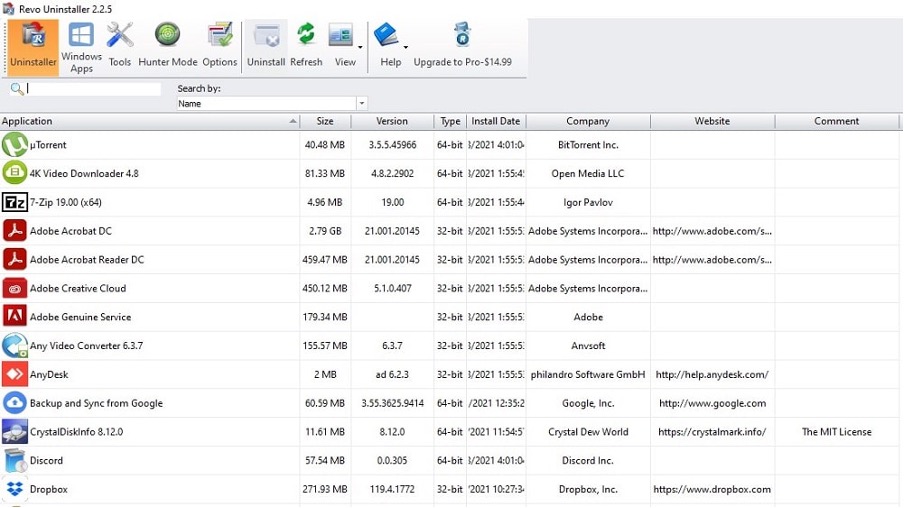
As you can see, the software offers uninstallation of both programs and Windows apps.
5. Optimize Computer Startup
Often when software is installed on a computer, it is automatically configured to be launched when the computer starts up. Depending on the software you have installed on your computer, this can result in a lengthy list of apps and programs which are unnecessarily consuming the resources of the computer. I would normally disable almost all of these as any software you require can be launched manually when you require it.
To access the startup items, enter Task Manager by right-clicking on the taskbar and selecting it. Then click on More details and select the Start-up tab.
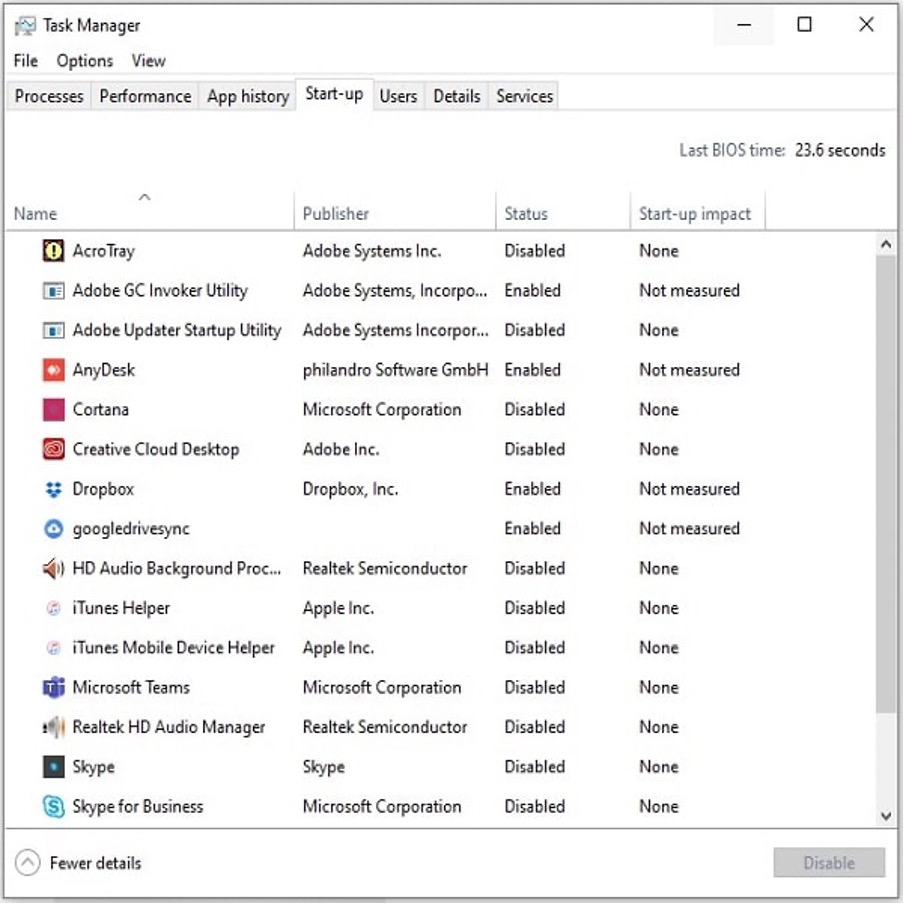
Simply click on any item you’d like to disable and then click on Disable.
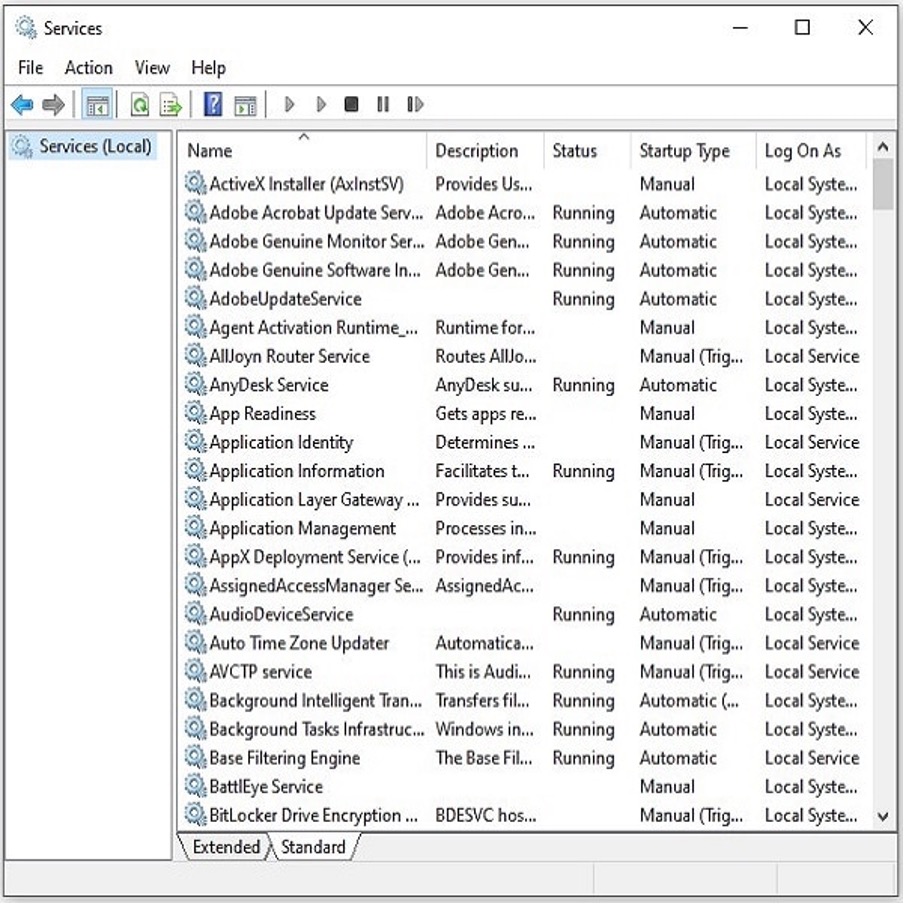
6. Check Running Processes and Services
This step is a little technical and requires more in-depth knowledge of your Windows operating system. It’s also not entirely necessary since, by this stage, you’ve already run a malware scan, uninstalled unnecessary software, and disabled items that don’t need to be launched at startup.
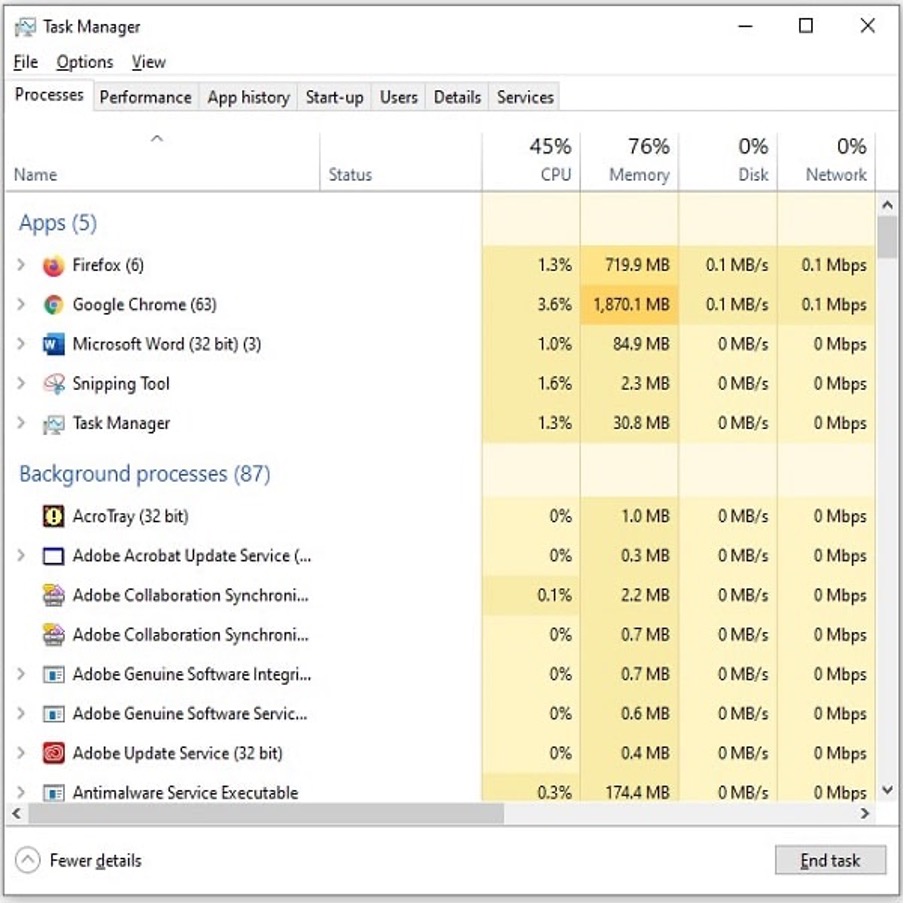
Essentially this step involves manually scanning the list of processes that are running on the computer, and the list of Windows services, in order to identify any rogue processes or services which should be terminated.
You can view the running processes by entering Task Manager and selecting the Processes tab. You will then see a lengthy list of the apps which are running, the background processes, and Windows processes.
In order to view the services, click on the Windows start button, and start typing Services. Then select it when it appears as the best match.
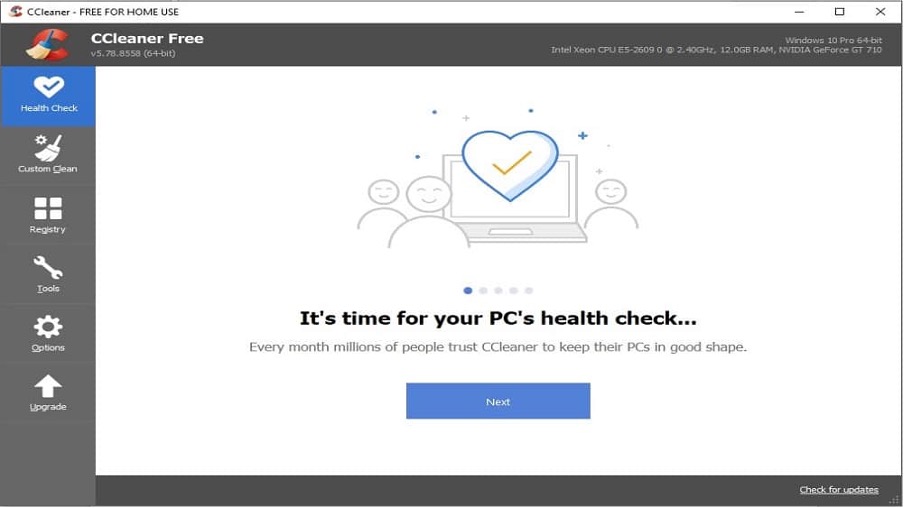
7. Clear Browser Caches
The final step in your computer health check and tune-up is to clear the caches of the internet browsers you use. You can do this manually, but I prefer to use a tool called CCleaner. This software is totally safe to use, and it not only clears your browser caches but also checks the health of your computer. By this stage in the process, your computer should already be in a healthy state, but it’s a useful final step. The free version of the software is all you require for this one-off health check. The software also has other optional features which you may find useful.
Also Read: The Ultimate Guide to Protecting Your Apple Device in 2022
Conclusion
So there you have my seven-step pathway to a healthy Windows 10 computer. Of course, any one of these steps can be run in isolation. When carried out together, you should find that the end result is that your computer performs at its optimal level following the procedure.
This Windows computer health check and tune-up guide were written by Norm McLaughlin. Norm is the owner of Norm’s Computer Services, a computer repair and IT support business in Brisbane, Australia.
